 MENU
MENUAs winter approaches, plants and tools aren’t the only things that need your attention before the snow flies. Don’t forget the appliances and furniture on your deck or patio.

One size doesn’t fit all when it comes to winterizing your deck or patio. I’m sure winterizing instructions came with your appliances and furniture. If that’s the case, follow them to the letter to protect your substantial investment. If not, let common sense dictate. Some materials can survive freezing temperatures by merely wrapping them in sheets of plastic or similar material while others should be taken inside.
Vinyl covers can be purchased for most gas or charcoal grills, if one didn’t come with the grill. Before covering it, however, you should make sure it’s clean. Clean it just as you would between uses but clean all parts of it, not just the cooking grill. Using a grill cleaning brush, remove all dirt and surface rust. Then, hold a piece of paper towel in a pair of tongs, dip it in vegetable oil and apply it to each piece. This is the same procedure used to “season” cast iron cookware. Some disassembly and reassembly may be required.
More and more people are grilling year-round so you may need to clean and oil it each time you’re planning to leave it for a period between uses. Also check for signs of mice living in your grill before each use. If you find signs that the grill is now a rodent residence, I’d thoroughly clean the inside with bleach or the disinfectant you use in your house to sanitize against the coronavirus and other viruses.
The material dictates the winterizing requirements for patio furniture. Stuffed furniture and cushions should be taken inside. Wicker furniture also would fare better under shelter. Most metal or plastic furniture can stay outside, unless the manufacturer recommends otherwise. It’s best to position them in a way that snow can slide off large, flat surfaces. Lightweight pieces like those made of plastic, need sheltering from the wind. If your patio has a sheltered area, you can gather everything there. Covering them will provide even more protection. If you can tie rope or netting around them and secure them to a railing or some other stationary object so much the better.
Winter storage location depends on where you can find space. Your garage or shed is the ideal place, if you have the room. You can just carry the pieces to their winter home. Lacking space at home, one of the many mini storage facilities would fill the bill. Granted you will need a truck or trailer to transport them back and forth, but you only need to make two trips a year and the storage cost is minimal.
Now that you have all the hardgoods secured or stored away, all that’s left are the containerized plants but that’s a job for another day.
The earliest spring colors to emerge in your landscape are supplied by your bulb garden – crocuses, daffodils, tulips and hyacinths are some of the more popular. If you thought, last spring, that you’d like more of these flowers, either in your present bulb garden or in another garden, now’s the time to take action for next spring.

You may have noted bare spots when your spring flowers came up last year. Bare spots could mean that some of your present bulbs died. Hopefully, you took pictures so you know where new bulbs should be planted and what color(s) you should plant. Many think all spring bulbs are perennials but they aren’t. Tulips, for example, are perennials in their native Turkey but much hybridization has taken place over the years. Today, most tulips still come back year after year, but others are treated as annuals. Be sure to read the package when you buy your bulbs or talk to one of the garden center horticulturists if you have questions about the bulbs you’re considering.
Daffodils are perennials, as are crocuses and hyacinths. One reason some of your bulbs didn’t appear last spring could be that they were dinner for a critter. An animal may have smelled the bulbs below the surface on a day when the ground wasn’t frozen. Another reason may be that the bulbs didn’t have enough fertilizer or they had too much water and didn’t have enough energy to bloom. You don’t have to place fertilizer in the hole when you first plant a bulb. It has plenty of food stored in the bulbs to flower and foliate the first year. After that, they may need to be fertilized. Bulbs that get too wet from a build-up of snow may become water- logged and not return the next year.
Before going out to buy new bulbs this fall, dig up where you think the failed bulbs should be or where photos show them to be. If the soil is disturbed and the bulbs are gone, you’ll know wildlife got to them. If the bulb is still in the hole, first check to make sure it’s positioned correctly. The pointed end should be facing up and the root end that looks like the base of an onion should be facing down. It may have tipped over when you backfilled or an animal rejected it and put it back upside down.
To inspect them, take any non-blooming bulbs from the hole and either rub or wash the soil off. Bulbs that are smaller than healthy bulbs may be malnourished. Soft or spongy bulbs may have drowned. In both cases, they should be replaced. If the bulb is in the hole wrong, it’s up to you whether to replace it or give it a second chance.
When picking colors at the garden center, try to remember the colors already in that bed. It’s easy to choose a color that doesn’t go well with those already in place, and that might make the bed less attractive. Also, don’t scimp on bulbs. They look better in mass plantings than just a few scattered plants. My final suggestion is to take pictures when your bulbs are in bloom each year in case you have to fill in with new bulbs six months later.
As the days get shorter and temperatures creep downward, it’s not the time to retreat into the house and begin our winter hibernation, especially this year when we’ve already spent a lot of time inside. There’s still plenty to do outside to prepare our landscapes for winter.
Here is a checklist of recommended projects to ensure your landscape has a good winter and is ready in the spring. This is nearly as complete of a list as possible. I realize that some items may not apply to you and some items that apply to you may not apply to your neighbors. Some items may remind you of things you have to do that aren’t on the list.
Have us inspect your trees and remove any hazards.
Just in case you’re tempted to wait until spring to do some or all items on the list, let me remind you that there will be another list of projects in the spring to prepare your landscape for the growing season. You may not want to add the work you put off now to that list. Postponing things like putting your deck or patio furniture in storage, winterizing your outdoor power equipment or removing fallen leaves may lead to performing repairs in the spring. So, now that you’ve read the list, check off those that apply to you and schedule them. According to the calendar, fall has begun so there’s no time to waste.
Let’s face it, winters in Rochester and the Finger Lakes can be brutal. That’s why we take special care to bundle up our children when they go outside. We need to do the same thing with our young trees and shrubs, especially those that we planted this year.
Start with the roots. Make sure your young trees and shrubs get plenty of water right up until the ground freezes. Moist soil holds more heat than dry soil so trees and shrubs have more time to stay active until frost and freeze force them into dormancy.
Spreading three or four inches of good, organic mulch over the root zone will provide additional insulation for these new plants that are still getting acclimated to their new home. Don’t pile it up against the trunk in a mulch volcano. Rather, leave a couple of inches gap between the trunk and the mulch. If you see cracks in the backfill, fill them up with soil.

Moving up the tree, wrap thin bark, deciduous tree trunks with paper tree wrap or plastic tree guards, available at garden centers or home stores. This protects the trunks from sun scald. Sun scald can result in frost cracks, which are vertical cracks in the bark.
Apply anti desiccant to the foliage of evergreen trees and shrubs to prevent winter burn. Anti desiccant is a wax like material that reduces the amount of water that the wind can blow from their leaves or needles, causing them to turn brown.
Really tender evergreen and deciduous trees and shrubs should be wrapped in burlap to further protect them from the wind and road spray. Use poles to hold the burlap several inches from the tree branches. Keep the top open so the tree or shrub will get sunlight and moisture.
If you use a plastic tree guard to protect against sun scald, it will also protect against hungry rodents who eat the outer and inner bark when they can’t find food in winter. If you don’t use plastic guards, I recommend wrapping the trunk in a material called hardware cloth. Hardware cloth is a flexible steel mesh. Wrap it around a young tree trunk to about a foot above the height of the highest average snowfall. Be sure you don’t wrap it too tightly.
Finally, rake up fallen leaves from beneath deciduous trees, otherwise they can mat up, hold water and block sunlight. Also, check the branch structure after the leaves fall to be sure all the branches are sound. Look for branches that are crossing, rubbing or broken and remove the weakest or the broken branches if you can reach them without a ladder. Leave climbing to our professional arborists. If you want, you can leave all of the winter preparation of your young trees and shrubs to our professionals.
Can you believe it? Summer is almost over! In two weeks, we’ll celebrate Labor Day, which marks the unofficial beginning of fall. Officially, fall doesn’t arrive until Tuesday, September 22, and hopefully there’s plenty of good weather in store until then and beyond.
For some, all planting takes place in the spring. I’m not sure why but suspect that it has to do with agriculture and vegetable gardens where crops are planted in spring and harvested in late summer and fall. This mindset is not the same for ornamental plants.
Except for fruit trees, shrubs and vines, most crop plants are annuals. Most ornamental plants are perennials. The nursery industry recommends planting most trees and shrubs in fall. Even herbaceous perennials can be planted or dug up and split in fall. And spring flowering bulbs like daffodils and tulips need to be planted this fall if you want them to bloom next spring.

The reason for this apparent break with conventional wisdom has to do with weather. Fall planting gives plants a considerable period to get established while the days are warm, the nights cool and the soil just the right growing temperature. The cool nights are ideal in helping plants get used to cold temperatures gradually. When winter arrives, they’ll be ready for dormancy.
In spring, fall plants will break dormancy and begin growing several weeks before spring planting can get underway. Because of their earlier start, last fall’s plants require less care during the summer than spring plants. That means less watering and, possibly, less fertilizing, saving you both time and money.
Don’t worry, you’ll still have plenty to do outside in spring. Evergreens should be planted in late spring. They retain their leaves or needles and don’t go completely dormant. If planted in fall, this can result in unsightly winter burn, unless you apply anti desiccant. Also, wait until spring to plant perennials that flower on new wood like butterfly bush and big leaf hydrangeas. Otherwise, you’ll have to prune the old wood away in the spring to allow new wood to grow.
Fall is for Planting isn’t just a way for garden centers to get rid of their remaining nursery stock. Most buy fresh stock for the fall. If plants look like they are leftovers, don’t buy them. If they look fresh, go ahead. Nurseries aren’t going to invest in stock that they’ll have to overwinter.
You can turn to our landscape professionals if you want to be sure you have winter hardy plants and the right plant is planted in the correct place. Then all you have to do is sit back and enjoy you new plants this fall, next spring and for years to come.
Hydrangeas are one of the most popular perennials today. One reason may be that the large mop like flowers last a long time without them needing to be deadheaded.
In fact, there is even a cultivar (a plant variety that has been produced in cultivation by selective breeding) called Endless Summer. This is a bigleaf variety, also known as a mophead hydrangea.
Flower color, as well as bloom duration, are also features that endears hydrangeas to people throughout the world. These large flower clusters range from white to purple. The most popular colors, though, are pink and blue. Those two colors are determined by the pH level of the soil.

Many gardeners are fascinated by pink and blue hydrangeas’ ability to change color, even during the growing season. People often ask how that’s done. It sounds complicated but it is simply done by manipulating the soil pH.
If your hydrangea flowers are pink, it means that the soil is alkaline (pH of 7 or above), also known as sour, basic or neutral. If the flowers are blue, it means the soil is acid (pH of 6 or less), or sweet. The best way to turn pink flowers blue is to add aluminum sulfate to the soil. If you want to turn blue flowers pink add lime to the soil. You can buy aluminum sulfate or lime at garden centers. Follow the label directions.
Some common household products can be used in place of aluminum sulfate or lime. Coffee grounds, Epsom salts or vinegar can be used to lower the pH. You probably won’t have to worry about changing blue flowers to pink in the Rochester, NY and Finger Lakes area because most soil is alkaline here.
Changing hydrangea flower color isn’t a party trick in which you place a potion on them, say an incantation and your guests watch the color change before their eyes. It takes awhile; the plant has to absorb the material you put on.
People also ask why their hydrangea flowers turn green. It’s a function of age. Green is the natural color of the sepals. As the sepals age the green color overpowers the pink, blue or white color. Thus the blooms fade to green over time.
When discussing hydrangeas there are two other important points to be aware of. Unlike most flowering shrubs, hydrangeas can be pruned in spring because their flowers grow on new wood while the plants we caution against pruning grow on old wood. The second point is that hydrangeas like partial sun, well drained soil and plenty of moisture.
Hopefully, you’ve stopped to enjoy your landscape on these hot summer days. Now is a good time to begin looking ahead to next season. As you’re relaxing, hopefully, you’re in the right frame of mind to contemplate landscape updates.

There are only two lightweight tools required for the task. One is a camera and the other is a notebook (either paper or electronic). If you keep a garden journal, this is the ideal place for these notes.
I suggest that you take photos and make notes now because your landscape may look the best it is going to all season. Many plants are still in bloom. All are still foliated. You’ll be able to see any deficiencies that have to be corrected. Store the photos in a safe place where you can find them this winter if you’re planning a 2021 project.
There’s also still time to do landscaping this season. If that’s your plan, pour another cool drink, sit on your deck or patio and let the sun generate ideas just like it generates food in plant leaves.
Thinking about 2021 projects while they’re still fresh in your mind and you’re sitting in the middle of your landscape allows you to make notes as ideas come to you. If you need more photos, you’re right there where you can take them.
If the ideas are slow coming or they don’t satisfy you, consider professional design assistance. We have a group of creative landscape designers who can bring your thoughts and dreams to life on paper. And when you and our designer create the design you love, we have landscape professionals who can create the design in your yard.
Having photos of the current landscape “in season” and notes on what you want the space to look like will allow our designers to better understand what changes are required. So often, they get their first look at the space in winter when it’s under a blanket of snow.
Whether you finalize your landscape plan now or during the winter, this will allow us to get your project on the schedule for early next spring so that installation and construction is finished as early as possible allowing you a full “season” of enjoyment.
How are your annuals looking? If they made it this far into the season, consider yourself lucky. If they’re starting to look tired, it’s late enough in the season that, rather than spend money on replacing summer plants, you can change them out for fall annuals.

Chrysanthemums, undoubtedly, pop into your mind when you think of fall flowers. Mums are nice, especially in the striking fall hues that are available today. In mid-August, however, you might consider mixing some bright colored mums in with the more muted fall colors. After all, they will probably be with you for quite a while. If you give mums plenty of sun and water, but not too much of either, you can expect up to six weeks of blooms.
You can have the longest flower display if you select plants with the buds just starting to open. You want to see a bit of color peeking out but not fully developed flowers. You can expect better performance if you select hardy or fall mums. But hardy doesn’t mean that they will last through the winter in our climate. Further south they will but not here.
Many people who buy mums for containerized display repot them as soon as they get them home. Nurseries plant them to present a striking display in the store but as they grow they get crowded. For best performance, repot them into a container that’s twice as big around as the original pot.
While chrysanthemums are certainly the most popular fall flowering annuals, they aren’t the only ones. Pansies and violas rank right up there, too. Fall pansies and violas can be planted in September and continue through October. They can survive fall frosts and even hard freezes. Further south than zone 6, they can survive all winter and bloom into April and May. Here in our zones 5 and 6 it becomes a little tricky because they won’t survive sustained temperatures below 25ºF.
There are several perennials that also provide fall color and grow back every year. They include asters, purple coneflower, yellow daisies and Autumn Joy sedum. These are easy to grow, don’t have to be replanted every year and don’t require much maintenance during the season. Unlike mums, pansies and violas, these fall perennials grow quite tall.
You don’t have to depend on turning leaves to provide fall color in your landscape. As you can see, you have a good choice of fall blooming annuals and perennials. You don’t have to put your green thumb away the day after Labor Day; trips to the garden store can be as exciting and fun in the fall as they are in spring.
The next generation of grubs has recently hatched. Checking your lawn for these destructive white larvae is easy and can be done before they get a foothold and begin damaging your lawn. Because they just hatched, grubs are quite small. As a result, they don’t have as big an appetite as they will when they grow up.
[caption id="attachment_1213" align="alignleft" width="300"]

Photo Credit: Bruce Watt, University of Maine, Bugwood.org.[/caption]
Grubs are the larval form of European chafer grubs and Japanese beetles, both of which are active in the Rochester and Finger Lakes regions. You may have seen big brown beetles flying around over the last few weeks. You may have even heard them. They tend to fly toward light and smack into windows. Those are last year’s grubs in their adult stage. They are flying around with mating as their prime objective.
After mating, the adults, which are commonly called June bugs, lay their eggs in the turf and then die. Upon hatching, the tiny grubs burrow just below the soil surface and begin feeding on grass roots. To check your lawn, select several spots in various areas of the yard. With a sharp knife, cut a one-foot square section of sod and peel it back.
If June bugs have selected your lawn to be home for the next generation, you’ll see white, crescent-shaped grubs. Count the number in each patch. If there are six or fewer, there is no cause for concern. Seven or more indicate the need for a grub control treatment. When you’ve finished counting, you can just lay the sod back in place and walk on it so it makes contact with the soil beneath it.
Left untreated, the newly hatched grubs will continue to gorge themselves on grass roots until the fall temperatures start to feel more like winter. Then they’ll burrow deeper into the soil to overwinter. In the spring, they will again come up to the root zone to dine until it’s time to pupate and morph into adults.
Late summer and early fall are the best times to treat for grubs. They are small and weak so the control material is more effective. If you wait until spring to treat them, they will be about two inches long and stronger, possibly too strong for the treatment to be lethal.
If you would rather leave grub management to our professionals, we would be happy to do an inspection and treat if necessary, regardless of whether or not you are on a lawn care program.
Your woody plants, especially shrubs, may look a bit stressed on these hot summer days. Your first diagnosis may be that they’re hungry so you should feed them. Resist the temptation! They may be thirsty but they’re not hungry.

Don’t fall victim to that common misconception that you can feed plants with fertilizer. Plants make their own food through photosynthesis. Nutrients from the air and soil enter into the process, too, and fertilizer replenishes the nutrients in the soil that have been depleted.
Nutrients are carried by water, which is absorbed by the plant roots and carried to the leaves. In summer, water is often scarce so plants slow down their nutrient–laced water absorption until fall. In fact, woody plants’ roots absorb the most water in spring and fall. Consequently, these are the seasons of greatest root growth.
The food they make in the fall is stored in the roots to sustain them through the winter and to break dormancy, flower and leaf out next spring. In spring, the plants need extra energy for new growth. Applying fertilizer in the summer may encourage tender late growth that may not have enough time to harden off for the winter.
If you want to give your summer-stressed woody plants a treat, make it water instead of fertilizer. They’ll appreciate it more, as will the environment and your wallet since you won’t have to buy fertilizer. When deciding which plants to water, start with any young trees and shrubs. They need it most. Some of your other shrubs may appreciate water, too. Large, mature trees have found water so you can skip them unless they look extremely stressed.
You can leave fertilizing to our professionals if you’d rather not have to worry about formulation and timing. Our Plant Health Care professionals will apply just the right formulation when it will be most beneficial to your trees and shrubs.
June is usually when conifer (cone bearing) trees and shrubs are ready to be pruned. This year may be an exception, however. Our cold, wintery May has delayed many plants’ growth and flowering. And it is growth that determines whether conifers need to be pruned at all.

This year, let the tree or shrub tell you when it should be pruned rather than relying on the calendar. The appearance of soft, light green needles at the ends of the branches is the first clue that your tree or shrub is almost ready for pruning. They look like extensions of the branches because that’s what they are. They are the plants’ new growth.
Don’t be in a hurry to reach for the pruners. It takes a few weeks for the new growth to reach its full length. You’ll know the new growth is through elongating when it begins darkening to the color of the other needles on the plant and the new foliage loses its softness. Then it’s time to prune. If you prune any earlier, you’ll only have to do it again because the new growth will keep right on growing.
Never prune just to prune. Prune with a purpose. If you want to just keep the plant at its present size, remove only the new growth. This is easily done with scissor-type pruning shears or loppers. If your objective is to reduce the height or girth, to shape the plant or to raise the crown by removing the lower branches, a saw may be needed in addition to your shears and loppers.
As with all tree pruning, you should leave the job to our professional arborists.
They have the training, experience and special equipment to do the job safely. Stick to pruning shrubs, or you can leave that to our arborists, too.
When pruning coniferous shrubs, I recommend wearing a long sleeve shirt, long pants, leather shoes and gloves. The needles may be sharp, especially if you have to reach into the interior of the shrub to remove a branch. Conifer shrubs are pruned the same way as deciduous shrubs. Don’t leave stubs and remove branches at junctions even if that means cutting at ground level. Know where each branch you cut terminates or you may have a big hole in the foliage, and that won’t look very attractive if it’s in front.
The same guidelines apply to broadleaf evergreens like rhododendrons and boxwoods. Their new growth is light colored leaves that turn a darker green as the new growth matures. Be sure flowering shrubs like rhododendrons are done blooming before you prune them.
The dog days of summer are upon us. I’ve never taken the time to research where that term came from, but I suspect that it refers to the way our furry friends find a cool, shady place to lie down and rest on these hot, humid days. We humans could take a page from the canine playbook and do the same.

Even the most ambitious, conscientious gardeners should take some time and step back and enjoy the fruits of your labor. Nothing would be happier if you did than your ornamental shrubs. This is because when there’s nothing better to do, many gardeners seem to gravitate to the pruners and start cutting back the shrubs.
If you feel the need to do something for your shrubs in the summer, might I suggest picking up the hose instead of the pruners. Shrubs can always use a drink of water especially in the heat we’ve been experiencing. But they would prefer to not be pruned in this weather. The exception is dead or broken branches. They should be removed anytime you see them.
You see only what’s going on to the outside of the shrub but there’s serious, life sustaining functions taking place beneath the surface. For example, next year’s buds (flower and leaf) are forming in the live tissue beneath the bark. They’ll appear in the fall, overwinter in a dormant state and break in spring. We caution you not to prune flowering shrubs until after they bloom in spring but that caution really begins now.
If you didn’t get a chance to rein in the unrestrained growth of spreading shrubs in the spring, resist the urge to do it now. When you remove a significant amount of foliage from a heat stressed shrub, it goes into survival mode. This condition will be noticed by insects and diseases looking for easy prey and a shrub in survival mode won’t offer much resistance. Not only is the shrub weakened from the heat and, possibly, dehydration but you’ve left the door open for pests to walk right in the open wounds caused by pruning.
Painting pruning cuts won’t help either. That was proven, decades ago, to exacerbate the problem. The pests can get there before the paint brush.
The bottom line is that everything in nature has its season and summer is not the season for pruning shrubs.
Meteorologists aren’t saying yet that we’ll see a drought in the Rochester and Finger Lakes area this summer, but they have pointed out frequently that June was a very dry month. If you really love your landscape and want to protect it, I suggest that you develop a watering plan now, before you need it.
A watering plan doesn’t have to be a formal document. However, you and your family should agree which plants get watered first, second, etc., otherwise the cost to provide the necessary inch of water per week to all plants in your landscape could be prohibitive.
Plants’ value and their ability to find water or otherwise survive should be the determining factors. Your trees and lawn are, arguably, your most valuable plants. But mature trees and even some shrubs are able find sufficient water. If they can’t, they’ll let you know with early onset defoliation. If trees or shrubs do start to turn color and drop their leaves, you may be able to stop it by watering. Mature woody plants won’t die after only one year of premature defoliation, but it might be worth a visit by one of our Plant Health Care professionals to make sure there isn’t an underlying condition contributing to the condition.
Young, recently planted trees and shrubs, should be high on your watering list. They need regular watering to assure that they get well established. Perennials (both woody and herbaceous)

should be your next priority. Annuals and turf should be at the bottom. Annuals last only one season and are inexpensive enough that they can be replaced during the season. Grass has the ability to go dormant when it’s dry and green up again when the rain return.
We are fortunate that we have plenty of water available to us but that’s not a reason to waste it. Besides water isn’t free. You get billed for it regardless of whether it reaches the plants or evaporates in the air. The way to conserve water is to get it as close to the plant roots as possible. That’s best done by using drip emitters with your irrigation system or soaker hoses if you don’t have an irrigation system.
Soaker hoses are porous hoses made from recycled tires. You can thread them through a planting bed with the hose passing close to each plant. You only turn the water on a quarter turn so watering takes about the same amount of time as drip irrigation. The pressure from opening the spigot any more than a quarter turn can blow the hoses apart. For automatic watering with soaker hoses, timers that attach to the spigot are available.
If you choose to water your lawn, sprinkling is your only option. I’m reluctant to recommend this because the sun evaporates much of the water leaving the sprinkler
before it reaches the ground.
Whether sprinkling, using drip emitters, or soaker hoses, it’s best to apply the whole inch at once rather than a little bit each day. The water will penetrate deeper and encourage stronger roots this way. When sprinkling, an age old measuring method is to place a container like a coffee can in the stream and time how long it takes an inch to accumulate. Then each time you move the sprinkler you can determine how long it takes to apply an inch by looking at the clock. Soaker hoses take about an hour to deposit an inch of water.
Yellow leaves detract from a landscape even though yellow is a leaf’s natural color. When they’re alive and making food, chlorophyll masks the yellow pigment.
Many people ask me what to do about yellow leaves. It’s one of those questions in which the answer is, “It depends.”

If the plant is a spring flowering bulb like a tulip or daffodil, yellow leaves have done what they’re supposed to for the season and should be removed. Removing these dead leaves will cause the plant to direct nutrients to any remaining green leaves so they can continue making food to be sent to the bulb for storage until it’s needed next spring.
As annuals get close to their life end, leaves may start turning yellow. This also happens when plants don’t get enough water. Removing yellow leaves when you deadhead the flowers will cause the plant to redirect nutrients to the green leaves where they will create, through photosynthesis, the energy the plant needs to create new flowers and, possibly, new leaves as well. Of course, they will need that all important inch of water per week to stay healthy. If yellowing continues, the plant has reached the end of its life and will have to be replaced.
Yellowing leaves on perennials and woody plants like trees and shrubs could indicate insufficient moisture, insects, or disease attack. Begin by making sure the plants are getting enough water. If leaves continue to yellow, I recommend an inspection by one of our Plant Health Care (PHC) professionals. Don’t remove yellow leaves from these plants. Leave them on the plant or on the ground where they fell to help our PHC professional make an accurate diagnosis. If the plant is suffering from a pest infestation, you don’t want to throw these leaves in the compost heap. Bag them and put them out with the trash, and then disinfect your tools before using them again.
You won’t see yellow needles on conifers like juniper or yews, but you may see brown. It could be winter burn if you didn’t apply antidesiccant or it may be a fungus. Our PHC professionals will be able to tell you which. Whichever the cause, the action is the same – remove the affected branches. But be careful that you don’t disfigure the plant.
I won’t get into a discussion of yellow or brown turf at this time, except to say it may be caused by a pest. But more likely, it’s the grass’ natural protective reaction to go dormant in excessive heat and drought.
If you get your hair cut short during the summer to beat the heat, don’t assume your lawn wants to be cut short too. Lawns actually fare the heat of the summer better when they are mowed no shorter than 3-4 inches. To many, seeing it that long is a culture shock, but the lawn will be healthier, and in the long run, it will save you time and money.
Having longer leaves provides more photosynthetic surface, allowing increased food production. In addition, longer leaves result in more robust clippings which will decompose and provide a natural fertilizer. This will reduce the need to apply chemical fertilizer, thus eliminating the expense of buying it and saving you time having to apply it.
Longer grass also encourages thicker turf, which discourages weeds. Weeds are lazy, opportunistic plants. If the grass is thin or there’s a bare spot, weeds will pick those areas to take root. That means you’ll have to take the time and/or spend the money to remove them. This may take the form of physically removing the weeds by pulling them, buying weed killer and applying it, or retaining our lawn care professionals to rid your lawn of weeds.
Thin turf or lawns with bare spots also attract insects like grubs and sod webworms. They know the thin grass won’t resist their attack as well as thick, healthy grass. When this occurs, more time and money is needed to control the insects and repair the damage.
Finally, going back to the hair analogy, it’s easier to keep longer grass looking nice than it is shorter grass. If you wear your hair short (in a brush, crew or buzz cut), for instance, you know that you have to go to the barber or stylist more often than if you wear it longer. With a shorter cut it is much more noticeable, when a few hairs grow faster than the rest. With longer hair you hardly notice. Likewise, when a lawn is mowed putting green short, all it takes is a couple of fast-growing blades of grass to make things looks raggedy and in need of another cut. In a lawn allowed to grow to 3 or 4 inches you won’t even notice those errant blades. If you don’t get a chance to mow it on time, nobody will know but you.
If you take my advice and mow long during the growing season, be sure to lower the mower to 2 or 2 ½ inches the last few times you mow it for the season. This will decrease the amount of leaf surface susceptible to the fungal diseases that attack lawns in winter.
We’re frequently asked if there are really any deer proof plants. The answer is no. When a deer is really hungry, it will eat any plant that’s available. However, deer are no different from other animals. They have their favorites, others that are OK and those that will do in a pinch. So, there are deer resistant plants.
Our landscape designers have lists of plants that deer favor and those they aren’t so fond of. There are also lists on the internet for the DIYer. Be careful of the one you select. There are deer in all areas of the country and their preferred diet varies with area.

One public list I found that is very complete was published by the Cornell Cooperative Extension Master Gardeners of Warren County. The site lists woody ornamental, annual/biennial and perennial plants as rarely, occasionally, seldom and frequently damaged by deer.
Only one woody ornamental is listed under rarely damaged. That is spruce. No doubt the sharp needles scratch on the way down. Twenty-three annuals/biennials are listed and include such favorites as marigold, dalia and wax begonia. There are 81 perennials on the list. Including bleeding hearts, daffodils, hellebores and purple coneflowers.
The site lists 19 woody ornamentals that deer seldom damage and171 that they occasionally damage and another 19 that they frequently damage. Among herbaceous plants, they occasionally damage parsley and sunflowers and frequently damage impatiens and hollyhocks. Seven species made the list of occasionally damaged perennials and nine the frequently damaged list.
There are folk remedies like putting human hair on a plant to repel deer. Fences may be a deterrent but you need one at least eight feet tall. That’s why plants that deer don’t like are my most effective enticement for them to go elsewhere for dinner.
Click Here If you’d like to check out the complete list on the Warren County Cooperative Extension website.
The calendar said April and that should have been the first full month of spring. Here in Western New York, though, it seems that Ole Man Winter didn’t look at the calendar. We had cold days and enough snow that Rochester rose to the top of the Upstate New York cities that vie for the dubious snowfall championship. Well, it’s a new month and we can expect it to be spring like. As you venture outside to begin gardening or landscape maintenance, may I suggest that you begin with spring clean-up?
I doubt if you could get away without doing spring cleaning inside, so why not clean the outside, too? After all, more people see the outside of your home than the inside. To make the job easier, here’s a checklist to help you get started:
• Pick Up Litter. Begin your clean up by walking your property, picking up debris that has accumulated. You’re sure
to find twigs, paper and other trash that blew into your yard. It may be on the ground, under shrubs or even caught on branches. While doing this, note other items that need your attention.
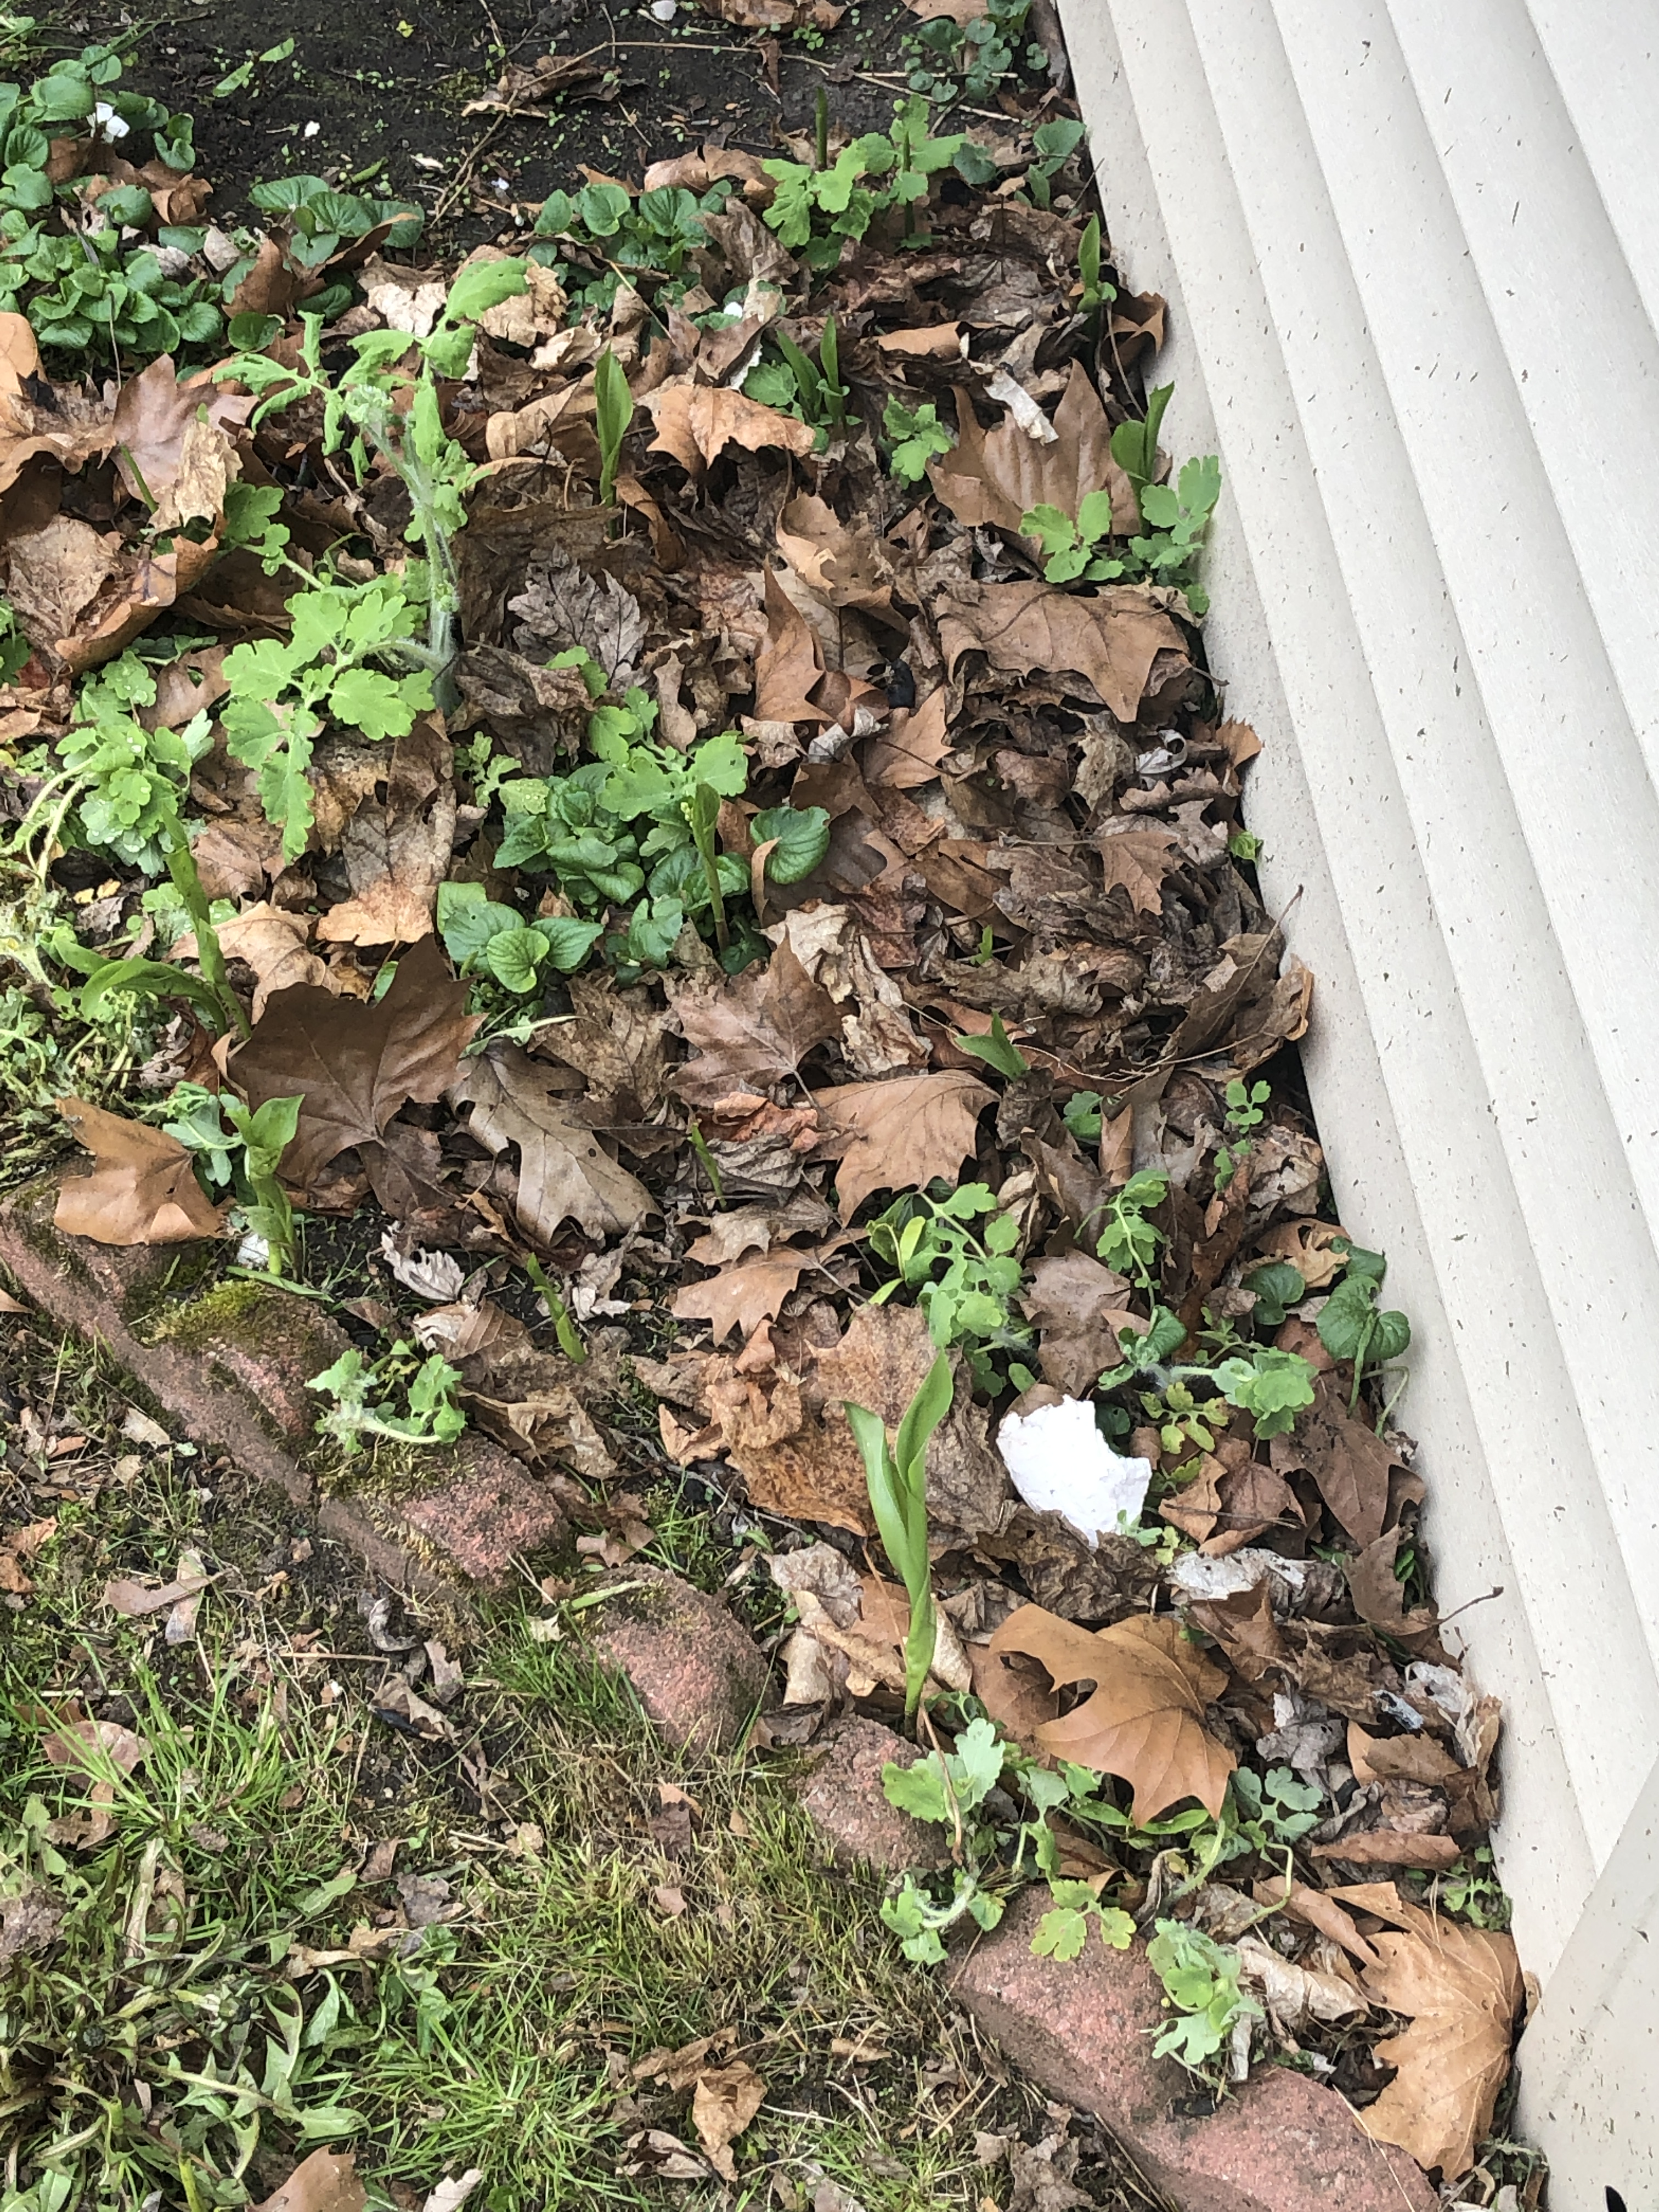
• Rake Up Leaves. If you missed any leaves last fall or if they blew into your yard during the winter, they should be raked up and thrown on the compost heap. This is especially important if the leaves are matted on the lawn. They could be trapping moisture and drowning the grass.
• Mulch. When there’s no more chance of a hard frost, rake the mulch to the edge of your beds and let the soil dry. If you added mulch for the winter, it’s time to remove it for the summer. If you lost a lot to decomposition, add enough to bring it up to 3 inches.
• Trim. Pull out dead annuals, trim back dead branches on perennials and cut ornamental grasses back to a level just above the ground so they can grow new grass.
• Repair. If your hardscape suffered winter damage, now’s a good time to repair it. This includes walks and patios, fences and furniture. At least, hose them off to get rid of winter grime.
• Repair or replace damaged plants. Try re-standing any small, toppled trees. If that doesn’t work, replant them. If all else fails, consider replacing them. This doesn’t include large trees. Leave them to our professional arborists.
This checklist is just a starting point. As you get into the project you will, no doubt, find more things that have to be done. Add them to the list. But if you want a nice clean yard without lifting a finger, we have well trained, experienced landscape technicians who would be happy to do the job for you at a reasonable price.
Any experienced farmer or gardener in western or central New York knows that Memorial Day is the time to plant. I’m sure that’s why the folks in Waterloo, who began the tradition that turned into the holiday, picked the end of May to put flowers on the graves of Civil War veterans.
We can plant early some years and get away with it but I hope you didn’t try it this year. The last hard frost was less than a week ago. Meteorologists are assuring us that those were the last of the season, so planting on Memorial Day this Monday should pose no problem.
This Memorial Day will be like no other. Most of the parades and other public ceremonies have been canceled. So a day of beautifying your yard would be an appropriate family activity before topping the three day weekend off with a cook-out.
Garden stores are among the businesses that are now open so you can shop for plants. Just remember to wear a mask and practice social distancing. If you still aren’t ready to go to stores yet, check with your favorite garden centers to see if you can order by phone or online for curbside pick-up.
You can get a lot planted in the three day weekend if you work together, even while observing social distancing. One person can plant flowers while another plants veggies. You can do this in the same bed and still maintain the proper social distance.
Mark out your bed on paper before you go to the garden center. You’ll then know how many of each plant to buy and exactly where they’ll go in the garden. Make one planter responsible for flowers and the other for veggies. Each starts at opposite ends and works toward the center. As you close the gap at the center, one of you can take a water break until the other is finished. Then switch and finish the bed.
I mention mixing flowers and edibles in the same bed because it’s a new movement. As long as we’re all doing things differently these days, why not give it a try? And what are the kids doing while you are planting beds? Buy extra plants and they can plant them in containers. Maybe you could hold a friendly competition to see who can design and plant the most creative container garden.
All in all, that sounds like a great way to spend quality family time in this year of challenges and restrictions. As for the results – the holiday was originally called Decoration Day. This year you can use the occasion to decorate your yard.
Spring is the best time to protect your valuable, majestic ash trees from the insidious emerald ash borer (EAB). It’s this invasive pest that’s to blame for all the dead and dying ash trees that we see around town. If you have an ash tree, it’s a sure bet that it will become a target for the EAB sooner or later.
[caption id="attachment_1347" align="alignleft" width="249"]

Here is an example of the damage caused by the Emerald Ash Borer.[/caption]
In May, the adult borers emerge from pupation inside the tree and begin eating the leaves while looking for a mate. With the courtship successful by the end of the month, females will deposit their eggs in indentations they make in the bark. As soon as the larvae hatch, they start boring their way into the interior of the tree, where they carry out their destructive task for nearly a year.
We are starting our spring treatment with a very effective product called TreeAge. The application requires special training and equipment to place the product
into the tree trunk. Consequently, it can only be applied by a state licensed/certified pesticide applicator. TreeAge is placed directly into the tree’s vascular system where it can be carried to where the EAB larvae are feeding. The borers are small, weak and more vulnerable in spring. So, spring treatments are more effective.
Trees that have not been attacked yet need to be treated only every two years. Those that have been attacked need to be treated every year. Not all attacked trees can be effectively treated, however. Those in which the EAB has killed more than a third of the tree are not good candidates for treatment.
When advising tree owners on whether or not to treat, we look at the aesthetics as well as the percentage of the tree that’s still alive. EAB destroys trees from the top down so we determine if we can prune the tree so it still has the distinctive ash tree shape or whether it will look like a topped tree no matter what we do. For trees that are completely dead or have more than a third of their crown destroyed by the EAB, we will provide an estimate for our trained, experienced, fully insured arborists to safely remove it.
With eight NYS Certified Pesticide Applicators and 13 Certified Arborists on staff, we can respond in a very timely fashion.
As the 2020 landscaping/gardening season gets into full swing, I want to remind you that Birchcrest had been deemed an essential business throughout this pandemic and remains open for business. All services are being performed and our service personnel are in full compliance with CDC guidelines as well as state and local regulations.
Because our maintenance departments were deemed essential, the tree, Plant Health Care (PHC) and lawn care departments never closed. Our designers continued to work at home and now our landscape construction department is back to work.
All of our employees are wearing masks and practicing social distancing when they are with other people. Wearing PPE (Personal Protective Equipment) is second nature to our maintenance staff. Our tree and PHC professionals wear special PPE to protect them when working in trees or applying material to protect plants.
If you’re planning a “staycation” this year, you may want to update your landscape with a new or expanded patio, deck and fresh plantings. Our landscape designers can meet with you, in person, or meet with you virtually for input, and to present their designs before we begin construction.
We’re all staying home more these days, and staying home is more pleasant in a new, fresh environment.
In the midst of today’s scary health crisis, there is gardening and landscaping, which reconnect people with the Earth and provide a wide range of benefits, both physical and mental/emotional. The emotional or mental aspect benefits involve relaxation, communing with nature, working off stress and focusing on creating beauty. The physical work of gardening builds strength and fitness, and burns off or reduces stress as well.
Giving your landscaping or gardening tools a good checking, cleaning, sharpening and lubricating will get you in the “spirit of the season” and ready to spring into action as soon as the weather lives up to the calendar.
We hope all of our readers, suppliers and customers are safe and healthy, and offer these tips for getting your gardening tools ready for spring so we can all enjoy the benefits of a beautiful home or business environment.
Sharpen

A dull blade is a bad blade. Not only will it do a lousy job of cutting back plants and branches, but it could cause injury. It might not cut you as deeply and dangerously as a sharper blade, but the extra amount of pressure you would need to exert could cause muscle strain and even a dull blade can still cause wounds to hands and limbs.
Take a good (but careful — we don’t want any injuries) look at any of your tools with blades, from pruning knives to lawnmowers. If their edges aren’t as sharp as possible, prepare them for spring use by sharpening them. Replace any removable blades, or entire tools, that are too far gone to be sharpened safely or effectively.
Lubricate
Many landscaping tools require lubrication to work their best and prevent injury to the user or the garden. This is the time to give everything a good dose of elbow grease and real grease or oil, so every tool runs or moves smoothly and functions at its best.
Check with our landscape professional or a garden center for the best product to use on various tools. WD-40 is the go-to lubricant for many of us, and it’s often already in your toolshed, but other products might be better for different items.
Look for signs of rust, which can often be polished away while leaving some tools still usable.
Don’t forget to check four-cycle tools or equipment like lawn mowers, which are likely to need oil changes before you crank them up and put them to work in your spring landscape.
Be sure to do this work in an open or well-ventilated space, especially if you use any spray products. Especially at this time, with an international health crisis underway, a respiratory condition or attack caused by inhaling a lubricant is the last thing any of us needs.
Trade old for new
Ergonomic tools are relatively new to the world of landscaping and gardening, but there are a lot of them and they are well worth investing in. Your old tools might be in great condition and still usable, but they might be contributing to backaches, muscle pain, poor posture and related reactions to using things that were designed for productivity or specific functions, but not for health and fitness.
Many of today’s gardening tools have been “retooled” to be easier and safer to use for your wrists, shoulders, back, knees and legs. Older gardeners are especially prone to such problems, and experiencing them could make you avoid the landscaping work you’ve always loved doing.
You can find pruners with rotating handles, weeders with grips made of natural materials, padded kneelers, long-lasting “bionic” gloves, handle extenders, shovels designed specifically for women, wheeled garden caddies, extended and telescoping tools, lightweight bulb planters … the options appear endless. Your landscape contractor, garden center or favorite gardening magazines can provide product names and sources, as well as tips for doing gardening chores in ways that are ergonomically correct.
Welcome to spring, and our hopes for a safe and successful season.
We are living in scary times, and landscapers are affected, even if not as deeply as some other industries or individuals. Nature is oblivious to the current medical crisis affecting daily life all around the country — spring has sprung and your landscape or garden has needs that won’t wait until the coronavirus is contained and life goes back to normal.
Like many businesses, some landscapers will have to reduce their workforces or even close their doors while efforts are made to control the coronavirus. In response, members of our industry are petitioning state governments to be designated as essential so our employees can continue to work and provide services to our customers. Colleagues who are sole owners/operators of landscape businesses are exempt and may stay open, at least for now. While landscaping might not be quite as vital as medicine, safety and security, the media, and a few other services, we do feel we are important to the health and daily life of both our customers and your landscapes.
Some states and smaller jurisdictions have already included landscaping as an essential service so such businesses can keep going despite stay-at-home orders and similar restrictions. New York State guidelines for businesses can be found here: https://esd.ny.gov/guidance-executive-order-2026
Birchcrest Tree and Landscape will stay open and continue serving our customers as long and as much as possible. One way that landscaping businesses are staying in business is by offering curbside pickup of plants and supplies, along with online sales and local deliveries. We are still performing tree work and landscape care while following CDC protocols. Please be assured that our employees are taking every precaution to stay healthy and protect the health of our customers. Check back here to see how we can keep your garden going and growing despite this scary time.
In the meantime, we encourage you to continue taking physical, mental and emotional comfort in tending your garden or landscape. Some things never change, and the value of interacting with the Earth and its bounty is one of them. Working in the garden is great exercise for both body and soul. If you have to tackle some landscaping tasks on your own, so be it; we should be able to help in case you need to redo or undo anything that happens now.
We wish everyone the best of luck and health as we all learn to cope with the challenges of the coronavirus and its impact on our daily lives — and livelihoods.
As we approach the halfway point of winter and encounter some warmer-than-usual weather, you might start thinking about getting back out in the yard. But I warn you, the ground is most likely still a bit too soft to walk on, much less work on, not to mention that the return of snow is inevitable, which suggests holding off for a little longer. However, now might be a good time to take inventory. By this, I mean taking a look around your landscape to see if it’s still “doing it” for you. Do you feel the same excitement you did when you first saw it? If not, a good use of this time and your desire to work in the yard is to start putting a plan together for when spring finally arrives for good.
If you’re looking for a source of ideas, we have a great one for you — in fact, it looks like it has you in mind: “Passport to Spring,” this year’s GardenScape, right around the corner from March 12–15 at the Dome Center in Rochester (check it out at https://rochesterflowershow.com/). Several hundred exhibitors will present new products, creative treatments, expert advice, seminars and much more at this event. It’s a great opportunity to find ways to express yourself through your landscape.

Even though your plants are not in bloom yet, you can still assess other aspects of your landscape to determine if it is time to update. For instance, is the edging around the beds cracked, broken or faded? What condition are the walkways and patio in? Is the deck rotting or are screws popping up, and is it still large enough to accommodate the entertaining you do? Do you have enough lighting around your yard to navigate your property safely and illuminate the features you like most about your home and landscaping? Are there any gaps or overgrown areas?
Beyond these aspects, now is a great time to start thinking about new plants to add to your landscape. This might be the year that you bring in new colors and arrangements that enhance your property — and raise your spirits!
If you have questions about what to consider doing for your landscape as spring approaches, let’s talk. Many homeowners around the Rochester area work with our design team to bring a fresh perspective to their gardens and overall landscaping. If you’re ready to “spring into spring,” we recommend contacting us to ask an arborist to inspect your landscape and make suggestions for ways to brighten it up. Our arborists can also let you know which GardenScape ideas will work in your landscape
You probably thought you were done with tests once you finished school, but nooo — lawns, gardens and other landscaping areas need soil tests every so often! Luckily, these are easily managed projects with important benefits for the long-term health, vigor, growth and beauty of your landscape.
The why of it
Soil in any landscape, whether it’s a small flower garden or a huge commercial property, can develop a wide range of issues. Either naturally because of your setting or region, or over time due to changing weather conditions, new plantings, fertilizer use, pesticide use, chemical runoff from neighboring properties, organic matter breaking down, etc., the soil in your landscape can lack nutrients that trees, shrubs and flowers need to thrive and look their best. It takes a professional soil test to know if your plants need more or different types of nutrients.
What to look for
The soil in your landscape or garden has to provide a certain level of nutrients and quality for everything living in it to do well. That means an ideal pH — a balance of acidic and alkaline levels in the soil leading to a neutral environment. If the soil in your landscape has issues, your plants will let you know. You might see browning or dying leaves, stunted growth, wilting, foliage turning yellow, and other symptoms of soil that is too acidic.
How it works
Soil testing is pretty straightforward. Our landscape professional will take samples to measure the pH level in

various locations throughout your landscape — how acidic or alkaline the soil might be.
While garden and home centers do offer a wide range of tools for doing this yourself, the results will depend on how well the soil sample is taken and assessed, so you might want to use a professional for this process. Even if you perform a soil test on your own, it’s smart to turn to the pros for your next steps.
If the soil in your landscape is too acidic or alkaline, don’t despair: Our landscape professionals can help with remediation. We will look for the ideal soil quality for your area and plantings. With that information in hand, it might be suggested that new planting choices that will be happier in your soil environment should be considered. But often we provide advice about ways to improve the soil quality so your existing plants can thrive as well as performing the treatment.
Passing the test
Once the soil testing is done, you can sit back and let your garden grow. Enjoy knowing that your landscape is healthy and ready to carry you through the next few seasons with your mind at peace.
As the weather improves, your green thumb may start getting itchy. The weather may not be good enough to do any planting or bed preparation yet but there are some things you can do that will get you out of the house and into the yard.On a nice day with no snow, may I suggest that you walk your yard looking for weeds, and pull them. Weeds are dormant now but many come back to life and begin growing before your lawn does. This means that the weeds have a head start on the grass and can begin crowding it out.

While the weeds you see have a head start, there are more weed seeds lurking just under the soil surface waiting for the soil to warm up. Unless you applied pre-emergent weed killer last fall, these will germinate as soon as the thermometer reaches the right temperature.Pulling dormant weeds in your lawn and planting beds now will keep you ahead in the annual war on weeds. Instead of being overwhelmed with both the dormant weeds and freshly germinated seeds, you’ll only have to worry about the newly germinated seeds once the busy growing season starts.While checking for weeds, it would be wise to also check the mulch in your planting beds. If it has settled to less than 3 inches, you might want to fluff it up. If it’s doesn’t return to at least 3 inches, getting more mulch and spreading it on a snow-free weekend will protect your plant roots and discourage weed germination. If it fluffs up to 4 inches or more, remember to remove the excess in the spring so you only have 2 or 3 inches.During your walk of the property, take a garbage bag and pick up any trash that has blown into your yard over the winter. You may be shocked to see how much you collect. It’s surprising to see how much stuff is under the snow. Collecting this trash during your winter walk(s) speeds clean up when it’s spring cleaning time.Doing these little tasks as you limber your green thumb during the winter means that you can get right to the good stuff – caring for your lawn and landscape – when spring actually arrives.
